Monorepo 规范实践

Entropy Tree Lv4

本文主要记录关于 Monorepo 的项目规范实践,借助 pnpm 包管理器和 NodeJs 环境等,通过各种配置实现对项目的自动化或半自动化规范。

更新日志 2024-03-11:

可以在当前页全文搜索新版 husky关键词查看博客变更内容

基础工具

NodeJs

安装可参考菜鸟教程

pnpm

安装参考官网教程

项目初始化

创建 package.json 和 tsconfig.json 文件,这两个文件不能为空,可以先单独写一个{}

手动创建

package.json

1
2
3
4
5
6
7
{
"name": "@monorepo-template/root",
"private": true,
"version": "0.1.0",
"description": "Monorepo Template Setup",
"license": "MIT"
}

tsconfig.json

1
{}

命令创建

package.json

1
pnpm init

tsconfig.json(需要提前安装好 typescript 相关的包)

1
tsc --init

项目结构

参考如下

1
2
3
4
5
6
7
8
9
10
11
12
13
14
15
16
17
18
19
20
21
22
23
24
25
26
/my-monorepo-project
├── /apps
│ ├── /web-app # 前端应用
│ └── /mobile-app # 移动应用

├── /packages
│ ├── /ui-components # 通用 UI 组件库
│ ├── /utils # 通用工具库
│ └── /api-client # API 客户端库

├── /services
│ ├── /user-service # 用户服务
│ └── /product-service # 产品服务

├── /libs # 可能包含更底层的共享代码或第三方库的封装

├── /scripts # 构建脚本、部署脚本等

├── /docs # 项目文档

├── /configs # 通用配置文件,如 ESLint、Prettier 配置

├── package.json # Node.js 项目的依赖和脚本(如果使用)
├── lerna.json # 如果使用 Lerna 管理多包
├── yarn.lock # 如果使用 Yarn 作为包管理器
└── .gitignore # Git 忽略文件配置

这里的 Lerna + Yarn 可以用 pnpm workspaces 替代,下面会介绍。

项目规范化

pnpm workspace

在项目根目录下创建 pnpm-workspace.yaml

1
2
3
packages: # 这里包含的是需要通过pnpm管理的项目文件夹
- 'apps/*'
- 'packages/*'

typescript

目前大部分项目会使用 typescript 对 javascript 进行增强,以下是在 Monorepo 中配置 typescript 的主要步骤

1.安装依赖

1
pnpm add -w -D typescript ts-node @types/node

-w表示安装到项目根目录下,-D表示作为开发依赖安装。

注意:全程需要使用 pnpm,不能混合使用 npm、yarn 等。

2.配置

在项目根目录下创建 tsconfig.xxx.json 的文件,例如 tsconfig.option.json

1
2
3
4
5
6
7
8
9
10
11
12
13
14
15
16
17
18
19
20
21
22
23
24
25
26
27
28
29
30
31
32
33
34
35
{
"compilerOptions": {
"composite": true,
"incremental": true,
// 这几项配置与Typescript的Project References,tsc的--build模式有关,
// 具体你可以查阅typescript文档,包括但不限于:
// https://www.typescriptlang.org/tsconfig#composite
// https://www.typescriptlang.org/tsconfig#incremental
// https://www.typescriptlang.org/docs/handbook/project-references.html

"declaration": true,
"declarationMap": true,
"emitDeclarationOnly": true,
"noEmitOnError": true,
"skipLibCheck": true,
// 这几项配置(当然还有其他相关配置)与生成js文件、d.ts文件,sourcemap文件有关,
// 具体你可以查阅typescript文档,包括但不限于:
// https://www.typescriptlang.org/tsconfig#declaration
// https://www.typescriptlang.org/tsconfig#emitDeclarationOnly
// https://www.typescriptlang.org/tsconfig#noEmitOnError

"esModuleInterop": true,
"allowSyntheticDefaultImports": true,
// 这几项配置与CommonJS和ESModule之间的互操作性有关,
// 具体你可以查阅typescript文档,包括但不限于:
// https://www.typescriptlang.org/tsconfig#esModuleInterop
// 我们也将会在后续的视频中演示依赖于此类配置的pkg,因此这里就不展开了

"resolveJsonModule": true,
"strict": true
// 这几项配置的作用比较显而易见,具体可查阅文档:
// https://www.typescriptlang.org/tsconfig#resolveJsonModule
// https://www.typescriptlang.org/tsconfig#strict
}
}

配置前面创建好的 tsconfig.json 继承 tsconfig.option.json

1
2
3
{
"extends": "./tsconfig.option.json"
}

3.多项目配置

以 packages 目录为例,这里包括 ui 和 utils 两个项目。

1
2
3
4
5
6
7
8
9
packages
├── ui
│ ├── src
│ ├── package.json
│ └── tsconfig.json
└── utils
├── src
├── package.json
└── tsconfig.json

ui 文件夹下的配置

package.json

1
2
3
4
5
6
7
8
{
"name": "@monorepo-template/ui",
"private": true,
"version": "0.1.0",
"description": "local ui package",
"license": "MIT",
"main": "./src/index.ts"
}

tsconfig.json

1
2
3
{
"extends": "../../tsconfig.option.json"
}

utils 文件夹下的配置

package.json

1
2
3
4
5
6
7
8
{
"name": "@monorepo-template/utils",
"private": true,
"version": "0.1.0",
"description": "local utils package",
"license": "MIT",
"main": "./src/index.ts"
}

tsconfig.json

1
2
3
{
"extends": "../../tsconfig.option.json"
}

依次把需要通过 pnpm 管理的项目按照上面的方式配置。

4.安装使用本地包

在 utils/src 中创建 index.ts 如下

1
2
3
export function add(x: number, y: number) {
return x + y;
}

然后在项目根目录的 apps 文件夹下的 web-app 项目中安装这个 utils 包

1
2
cd apps/web-app
pnpm add @monorepo-template/utils

在 web-app/src 下创建 index.ts 如下

1
2
3
4
5
6
import { add } from '@monorepo-template/utils'
function main() {
console.log('sum: ', add(1, 2));
}

main();

在终端使用 ts-node 执行该文件,需要先在全局安装 ts-node

1
ts-node ./src/index.ts

如果没有在全局安装 ts-node,可以在该项目的 package.json 中添加配置

1
2
3
4
5
6
7
{
//...
"scripts": {
"debug": "ts-node ./src/index.ts"
},
//...
}

然后在终端执行

1
pnpm run debug

代码质量和格式检查

1.Eslint 代码质量检查

安装依赖

1
pnpm add -w -D eslint @typescript-eslint/parser @typescript-eslint/eslint-plugin

在项目根目录下创建 .eslintrc 和 .eslintignore

.eslintrc

1
2
3
4
5
6
7
8
9
10
11
12
13
14
15
16
17
18
19
20
21
22
23
24
25
26
27
28
29
30
31
32
33
34
{
// 该配置项主要用于指示此.eslintrc文件是Eslint在项目内使用的根级别文件,并且 ESLint 不应在该目录之外搜索配置文件
"root": true,

// 默认情况下,Eslint使用其内置的 Espree 解析器,该解析器与标准 JavaScript 运行时和版本兼容,而我们需要将ts代码解析为eslint兼容的AST,所以此处我们使用 @typescript-eslint/parser。
"parser": "@typescript-eslint/parser",

// 该配置项告诉eslint我们拓展了哪些指定的配置集,其中
// eslint:recommended :该配置集是 ESLint 内置的“推荐”,它打开一组小的、合理的规则,用于检查众所周知的最佳实践
// @typescript-eslint/recommended:该配置集是typescript-eslint的推荐,它与eslint:recommended相似,但它启用了特定于ts的规则
// @typescript-eslint/eslint-recommended :该配置集禁用 eslint:recommended 配置集中已经由 typeScript 处理的规则,防止eslint和typescript之间的冲突。
// prettier(即eslint-config-prettier)关闭所有可能干扰 Prettier 规则的 ESLint 规则,确保将其放在最后,这样它有机会覆盖其他配置集
"extends": [
"eslint:recommended",
"plugin:@typescript-eslint/recommended",
"plugin:@typescript-eslint/eslint-recommended",
"prettier"
],

// 该配置项指示要加载的插件,这里
// @typescript-eslint 插件使得我们能够在我们的存储库中使用typescript-eslint包定义的规则集。
// prettier插件(即eslint-plugin-prettier)将 Prettier 规则转换为 ESLint 规则
"plugins": ["@typescript-eslint", "prettier"],

"rules": {
"prettier/prettier": "error", // 打开prettier插件提供的规则,该插件从 ESLint 内运行 Prettier

// 关闭这两个 ESLint 核心规则,这两个规则和prettier插件一起使用会出现问题,具体可参阅
// https://github.com/prettier/eslint-plugin-prettier/blob/master/README.md#arrow-body-style-and-prefer-arrow-callback-issue
"arrow-body-style": "off",
"prefer-arrow-callback": "off",
"@typescript-eslint/no-explicit-any": "off"
}
}

.eslintignore

1
2
3
4
5
node_modules/

pnpm-lock.yaml

*.md

在项目根目录下的 package.json 中配置

1
2
3
4
5
6
7
8
9
10
{
//...
"scripts": {
//...
//"__eslit__comment__": "查阅eslint文档 https://eslint.org/docs/latest/use/command-line-interface 了解cli工具的options",
"lint": "eslint ./ --ext .ts,.js,.json --max-warnings=0",
//...
},
//...
}

在前面的 index.ts 中编写不符合 eslint 规则集的代码

1
2
3
4
5
6
7
//...

function test() {
console.log("test")
}

//...

执行命令检查代码

1
pnpm run lint

2.Prettier 统一代码格式

安装依赖

1
pnpm add -w -D prettier

在项目根目录下创建 .prettierrc 和 .prettierignore

.prettierrc

1
2
3
4
5
6
7
{
//"__comment__": "查阅链接https://prettier.io/docs/en/options了解prettier各项配置",
"semi": true,
"singleQuote": true,
"tabWidth": 2,
"printWidth": 120
}

.prettierignore

1
2
3
node_modules/

pnpm-lock.yaml

在项目根目录下的 package.json 中配置

1
2
3
4
5
6
7
8
9
{
//...
"scripts": {
//...
"format": "prettier --config .prettierrc '.' --write",
//...
},
//...
}

编写测试代码,执行命令格式化代码

1
pnpm run format

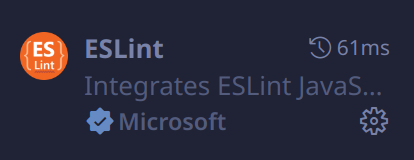
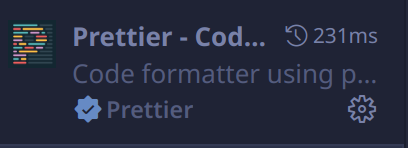
上面的配置方式仍需要手动格式化代码,不过实际编码过程中往往是持续、自动地根据对代码进行格式化。在对于 vscode、vim 等有 prettier 插件支持的编辑器中很容易实现,不过对于记事本这些无插件支持的编辑器可以考虑官方推荐的另一种方式 onchange

对于 VsCode 编辑器,安装以下两个插件即可

image-20240220153025970image-20240220153115691

以下配置对于有 prettier 插件支持的编辑器来说是可选的。

安装 onchange 依赖

1
pnpm add -w -D onchange

在项目根目录下的 package.json 中配置

1
2
3
4
5
6
7
8
9
10
11
{
//...
"scripts": {
//...
//"__prettier__comment": "查阅prettier文档 https://prettier.io/docs/en/cli 了解cli工具的options, 查询链接https://prettier.io/docs/en/watching-files, https://www.npmjs.com/package/onchange 获取onchange文档",
"format": "prettier --config .prettierrc '.' --write",
"format-watch": "onchange -d 1000 '**/*' -- prettier --config .prettierrc --write {{changed}}",
//...
},
//...
}

在终端运行该脚本,它就会持续检测文件变化情况并根据配置格式化代码。

1
pnpm run format-watch

Eslint 与 Prettier 适配

Eslint 中也包含了一部分格式化规则,但这些规则往往用不到,并且会与 Prettier 冲突。以下是通过一系列配置将 Prettier 的规则转换为 Eslint 的规则。

eslint-config-prettier

该配置用于关闭所有可能干扰 Prettier 规则的 Eslint 规则,使 Prettier 规则可以覆盖 Eslint 规则。

eslint-plugin-prettier

该配置用于将 Prettier 规则转换为 Eslint 规则

安装依赖
1
pnpm add -w -D eslint-config-prettier eslint-plugin-prettier
配置

在 .eslintrc 中增加配置(在前面的配置中已经添加,这里单独说明一下)

1
2
3
4
5
6
7
8
9
10
11
12
13
14
15
{
//...
"extends": [
//...
"prettier"
],
//...
"plugins": ["@typescript-eslint","prettier"],
"rules": {
"prettier/prettier": "error",
"arrow-body-style": "off",
"prefer-arrow-callback": "off",
"@typescript-eslint/no-explicit-any": "off"
}
}

至此 Eslint 与 Prettier 适配完成。

3.Husky 创建管理 git hook

git hook 是由 git 提供的在满足特定条件下自动执行脚本的功能。

安装依赖

1
pnpm add -w -D husky

启用 git hook,该命令会在项目根目录下生成 .husky 文件夹

1
npx husky install

新版 husky 使用以下命令

1
npx husky init

在项目根目录下的 package.json 中配置

1
2
3
4
5
6
7
8
9
10
{
//...
"scripts": {
//...
// 自动在git clone时自动通过husky启用git hook
"prepare": "husky install",
//...
},
//...
}

新版 husky 将上面的husky install简化为husky

第一个 git hook 是在提交 commit 之前执行 eslint 工具对代码进行质量和格式检查,即执行 package.json 中的 lint 脚本。

创建该 git hook,该命令会在 .husky 文件夹下生成 pre-commit 脚本。

1
npx husky add .husky/pre-commit "pnpm run lint"

新版 husky 使用以下命令

1
echo "pnpm run lint" >> .husky/pre-commit

如果在提交 commit 时检测到代码不符合 eslint 规则,会终止本次提交。在执行pnpm run format-watch格式化代码之后就能正常提交。

不过这种方式还是会对所有文件进行检查,后面会介绍一种增量格式化的工具。

4.Lint-staged 增量格式化

lint-staged 是用于辅助 lint 的增强工具。

安装依赖

1
pnpm add -w -D lint-staged

在项目根目录下创建 .lintstagedrc.js (支持多种格式,具体参考官网文档)

1
2
3
4
5
6
7
8
9
10
11
12
13
14
15
const { ESLint } = require('eslint');

const removeIgnoredFiles = async (files) => {
const eslint = new ESLint();
const ignoredFiles = await Promise.all(files.map((file) => eslint.isPathIgnored(file)));
const filteredFiles = files.filter((_, i) => !ignoredFiles[i]);
return filteredFiles.join(' ');
};

module.exports = {
'*': async (files) => {
const filesToLint = await removeIgnoredFiles(files);
return [`eslint ${filesToLint} --max-warnings=0`];
},
};

这段脚本的作用是对所有被 lint-staged 检测到的文件,过滤掉被忽略的文件,然后对这些文件执行 lint 脚本。

接下来需要手动更改 pre-commit 脚本如下

1
2
3
4
#!/usr/bin/env sh
. "$(dirname -- "$0")/_/husky.sh"

npx lint-staged

新版 husky 只需要修改脚本如下

1
npx lint-staged

使用命令echo "npx lint-staged" > ./husky/pre-commit即可

之后提交 commit 时就只会对发生更改的文件进行检查。

5.Commitlint + Commitizen 规范提交

commitlint 用于校验 commit message,commitizen 用于交互式生成 commit message,这两个组合使用对于 commit 规范的统一非常有帮助。

Commitlint

安装 commitlint 的依赖

1
pnpm add -w -D @commitlint/cli @commitlint/config-conventional 

在项目根目录下创建 .commitlintrc.json

1
2
3
4
5
6
{
"extends": ["@commitlint/config-conventional"],
"rules": {
"scope-empty": [2, "never"]
}
}

这里的extends是扩展 commitlint 官方的配置,scope-empty表示的是提交 commit 时,scope 范围不能为空。

创建 commit-msg 的git hook

1
npx husky add .husky/commit-msg 'npx --no -- commitlint --edit "$1"'

新版 husky 使用以下命令

1
echo "npx --no -- commitlint --edit \$1" > .husky/commit-msg

该脚本的作用是在提交或修改 commit message 时进行校验,以确保项目拥有统一规范的 commit messgae。

Commitizen

安装 commitizen 依赖

1
pnpm add -w -D commitizen cz-coventional-changelog 

在项目根目录下创建 .czrc 配置文件

1
2
3
{
"path": "cz-conventional-changelog"
}

cz-conventional-changelog是 commitizen 的 conventional-changelog 适配器,该适配器会以 AngularJS 的 commit messgae 规范逐步引导完成 commit message 的创建。

在项目根目录下的 package.json 中配置

1
2
3
4
5
6
7
8
9
{
//...
"scripts": {
//...
"cz": "cz",
//...
},
//...
}

执行以下命令生成 AugularJS 规范的 commit message

1
pnpm run cz

VsCode 的配置

VsCode 编辑器自身也提供了一定的配置项。

在项目跟目录下创建 .vscode 文件夹,在文件夹内创建 extensions.json 和 settings.json。

extensions.json 用于推荐安装的插件,这里推荐 eslint 和 prettier 的插件。

1
2
3
{
"recommendations": ["esbenp.prettier-vscode", "dbaeumer.vscode-eslint"]
}

settings.json 是 VsCode 的项目内配置,下面是一份参考配置。

1
2
3
4
5
6
7
8
9
10
11
12
13
14
15
16
17
18
19
20
21
22
23
{
"typescript.tsdk": "node_modules/typescript/lib",
"editor.formatOnSave": true,
"editor.defaultFormatter": "esbenp.prettier-vscode",
"editor.codeActionsOnSave": {
"source.organizeImports": true,
"source.fixAll.eslint": true
},
"editor.formatOnSaveMode": "file",
"editor.formatOnType": true,
"editor.formatOnPaste": false,
"[typescript]": {
"editor.formatOnSave": true,
"editor.defaultFormatter": "esbenp.prettier-vscode",
"editor.codeActionsOnSave": {
"source.organizeImports": true,
"source.fixAll.eslint": true
},
"editor.formatOnSaveMode": "file",
"editor.formatOnType": true,
"editor.formatOnPaste": false
}
}

至此基础的项目工程化配置完成。

项目依赖安装方式

Monorepo 中有两种项目,一种是 Monorepo 自身这个总体的项目,一种是由 Monorepo 管理的具体的模块项目。

前面操作的都是在总体项目下完成的,而具体的项目有两种依赖安装方式。

一种方式是进入到对应的目录下,执行不带-w参数的 pnpm 命令安装依赖。

另一种方式是在总体项目根目录下的 package.json 中添加脚本

1
2
3
4
5
6
7
8
9
{
//...
"scripts": {
//...
"project-name": "pnpm --filter @monorepo-template/project-name",
//...
},
//...
}

project-name为具体项目对应的名称。

然后可以在总体项目根目录下通过以下命令安装依赖

1
pnpm project-name add xxx

如果遇到 pnpm 的 missing peer 警告信息,可以在总体项目根目录下创建 .npmrc,添加以下内容

1
2
auto-install-peers=true
strict-peer-dependencies=false

具体可以参考官方文档

Project References 和 tsc --build

project references 也是由 typescript 提供的功能,用于具体指出多项目之间的依赖关系,从而实现多项目的管理。

实际生产环境中不会使用 ts-node 运行项目,而是把项目编译打包成 js 产物,使用 NodeJS 运行时直接运行 js 启动服务。

这里假设有一个 project-name 项目,依赖一个 package-name 本地包。

修改 project-name 项目的 package.json 文件

1
2
3
4
5
6
7
8
9
10
11
{
//...
"scripts": {
"debug": "ts-node ./src/app.ts",
"clean": "rm -rf ./dist *.tsbuildinfo",
"compile": "tsc --build",
"build": "pnpm run clean; pnpm run compile",
"start": "node ./dist/app.js"
},
//...
}

然后修改 project-name 项目的 tsconfig.json 文件

1
2
3
4
5
6
7
8
9
{
"extends": "../../tsconfig.option.json",
"compilerOptions": {
"declarationMap": false,
"emitDeclarationOnly": false,
"rootDir": "./src",
"outDir": "./dist"
}
}

在总体项目根目录下执行命令编译打包项目

1
pnpm project-name run build

使用以下命令运行项目

1
pnpm project-name run start

但是目前还不能直接通过该命令运行,需要进一步配置。

多项目编译打包需要修改 package-name 本地包的 package.json,修改之前的 main 的配置./src/index.ts为编译后的产物./dist/index.js

1
2
3
4
5
{
//...
"main": "./dist/index.js",
//...
}

同样地配置 tsconfig.json

1
2
3
4
5
6
7
8
9
{
"extends": "../../tsconfig.option.json",
"compilerOptions": {
"declarationMap": false,
"emitDeclarationOnly": false,
"rootDir": "./src",
"outDir": "./dist"
}
}

回到 project-name 项目的 tsconfig.json 文件,添加 references 配置,表明了当前项目的本地依赖包。

1
2
3
4
5
6
7
8
9
10
11
12
13
14
15
16
17
{
//...
"references": [
{
//path具体到tsconfig.json所在的目录
"path": "../../packages/package-name"
}
],
"compilerOptions": {
//...
//可选配置,不进行增量编译,不生成d.ts文件,也不会生成.tsbuildinfo文件
"incremental": false,
"composite": false,
"declaration": false,
//...
}
}

在编译 project-name 项目时,tsc 会自动编译 package-name 本地包的源码。

现在就能通过pnpm project-name run build一步编译项目和项目依赖的本地包。

Project References 用于明确依赖关系,检测依赖是否正确编译或是否是最新的编译,如果没有,将会自动对被依赖的包执行tsc --build进行编译更新。

参考资料

视频资料

基于pnpm workspace,超清楚简单的monorepo项目创建与基础演示

nodejs项目工程化 eslint prettier husky lint-staged commitlint commitizen

monorepo中使用project refrences,基于fastify的NodeJS Web服务

源代码资料

pnpm

eslint

prettier

husky

lint-staged

commitlint

commitizen

startup-monorepo-fastify-phaser-colyseus-threejs

  • 标题: Monorepo 规范实践
  • 作者: Entropy Tree
  • 创建于 : 2024-02-20 17:31:06
  • 更新于 : 2024-03-11 12:03:54
  • 链接: https://www.entropy-tree.top/2024/02/20/monorepo-setup-guide/
  • 版权声明: 本文章采用 CC BY-NC-SA 4.0 进行许可。
评论